 How-to
How to Prevent Bathroom Mold Behind Walls
Table of Contents
- What Causes Mold to Grow Behind Bathroom Walls
- How to Recognize Signs of Mold Behind Shower Walls
- Bathroom Ventilation to Prevent Mold Growth
- How to Waterproof Shower Walls Correctly
- Shower Wall Panels to Prevent Mold and Moisture
- Moisture Control and Routine Maintenance
- When to Call a Professional for Hidden Mold
- Frequently Asked Questions
Last Updated: October 19, 2026
What Causes Mold to Grow Behind Bathroom Walls
Mold grows behind bathroom walls because of moisture trapped inside the wall assembly. Water from showers creates condensation. That moisture gets trapped behind tiles, panels, or drywall. Without proper waterproofing and ventilation, mold thrives in these hidden spaces.
The most common causes are straightforward. Poor waterproofing lets water seep through grout and caulk into the wall cavity. Inadequate ventilation means moisture stays trapped instead of being expelled outdoors.
Most homeowners don't realize how much moisture builds up during a single shower. A 20-minute shower can release several gallons of water vapor into the air. If that moisture has nowhere to go, it condenses inside the walls.
Here's what happens behind the scenes:
- Water vapor from hot showers rises and cools as it contacts walls
- Condensation forms on cold surfaces inside the wall cavity
- Moisture soaks into drywall, insulation, and wood framing
- Mold spores land on these damp materials and begin growing
- Growth continues unnoticed for weeks or months
- By the time you see signs on the surface, the problem is already extensive
The real problem isn't a single shower. It's the cumulative effect of daily moisture without proper escape routes. Bathrooms that lack adequate ventilation create the perfect environment for hidden mold to develop.
How to Recognize Signs of Mold Behind Shower Walls
Signs of mold behind shower walls often appear long after the problem starts. The visible indicators are usually the last warning. By the time you notice them, mold has already colonized the hidden spaces.
Look for these warning signs on the surface:
Visual indicators:
- Discoloration or dark staining on grout or caulk
- Soft or crumbling grout between tiles
- Loose or bulging tiles that no longer sit flat
- Staining that appears in the same spot repeatedly after cleaning
- Discoloration spreading along grout lines or caulk seams
Physical changes:
- Tiles that feel spongy or soft when pressed
- Caulk that has gaps, cracks, or pulls away from edges
- Visible mold growth in corners or along the base of the shower
- Water damage or paint bubbling on walls adjacent to the shower
Sensory signals:
- Musty odor in the bathroom, especially near the shower
- Smell that persists even after thorough cleaning
- Odor that returns quickly after ventilation
The challenge with mold behind walls is that surface signs don't tell the whole story. You might see a small dark spot on grout and assume it's just surface mildew. But that spot often indicates a much larger problem hidden behind the tile. Water intrusion at that location has been ongoing for months.
Professional inspection can reveal what's happening inside. Moisture meters detect excess water in walls before visible damage appears. Thermal imaging shows temperature differences that indicate moisture accumulation. If you suspect hidden mold but can't see obvious signs, these diagnostic tools confirm the problem.
Bathroom Ventilation to Prevent Mold Growth
Ventilation is your first defense against mold behind bathroom walls. A properly functioning exhaust fan removes moisture before it condenses inside walls. Without adequate ventilation, even the best waterproofing will eventually fail.
The exhaust fan must be sized correctly for your bathroom. Building codes require exhaust fans rated for the bathroom's square footage. A fan that's too small won't remove enough moisture.
Here's what effective ventilation accomplishes:
- Removes moisture-laden air from the bathroom to the outdoors
- Reduces humidity levels that trigger condensation
- Prevents moisture from accumulating in wall cavities
- Extends the life of waterproofing materials and sealants
- Reduces the need for frequent recaulking and repairs
Install the exhaust fan ductwork to vent directly outdoors. Many homes have fans that vent into attics or crawl spaces. This simply moves the moisture problem elsewhere.
Opening a bathroom door or window after showering also helps. This allows warm, moist air to escape into other areas of the home where it can be managed.
The fan should run automatically on a humidity sensor or timer. Set it to activate when humidity rises above 60 percent.
How to Waterproof Shower Walls Correctly
Waterproofing is the foundation to prevent bathroom mold. Water that enters the wall cavity finds organic materials to feed mold growth. Proper waterproofing stops water at the surface before it penetrates deeper.
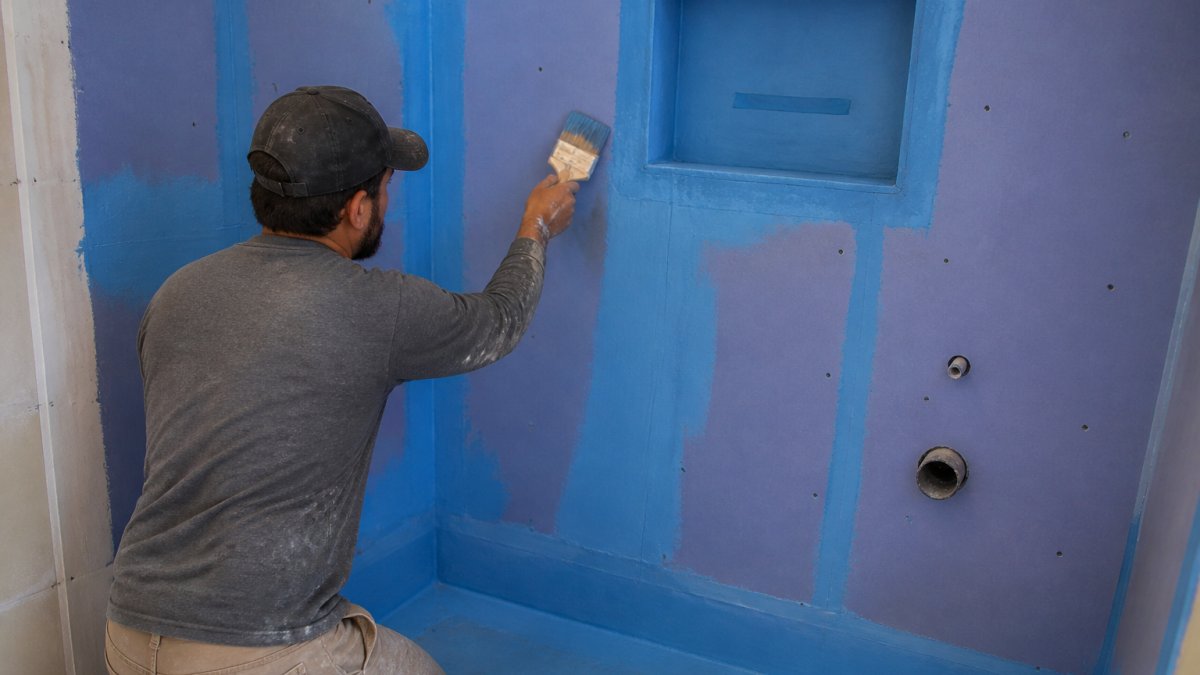
The waterproofing system consists of multiple layers working together. Each layer provides backup protection if the one above fails. This redundancy is what separates a shower that stays dry for decades from one that develops mold within years.
Backer Board and Waterproofing Membranes
Start with cement backer board instead of standard drywall. Drywall absorbs water and provides food for mold. Cement backer board resists moisture and won't support mold growth even if water reaches it.
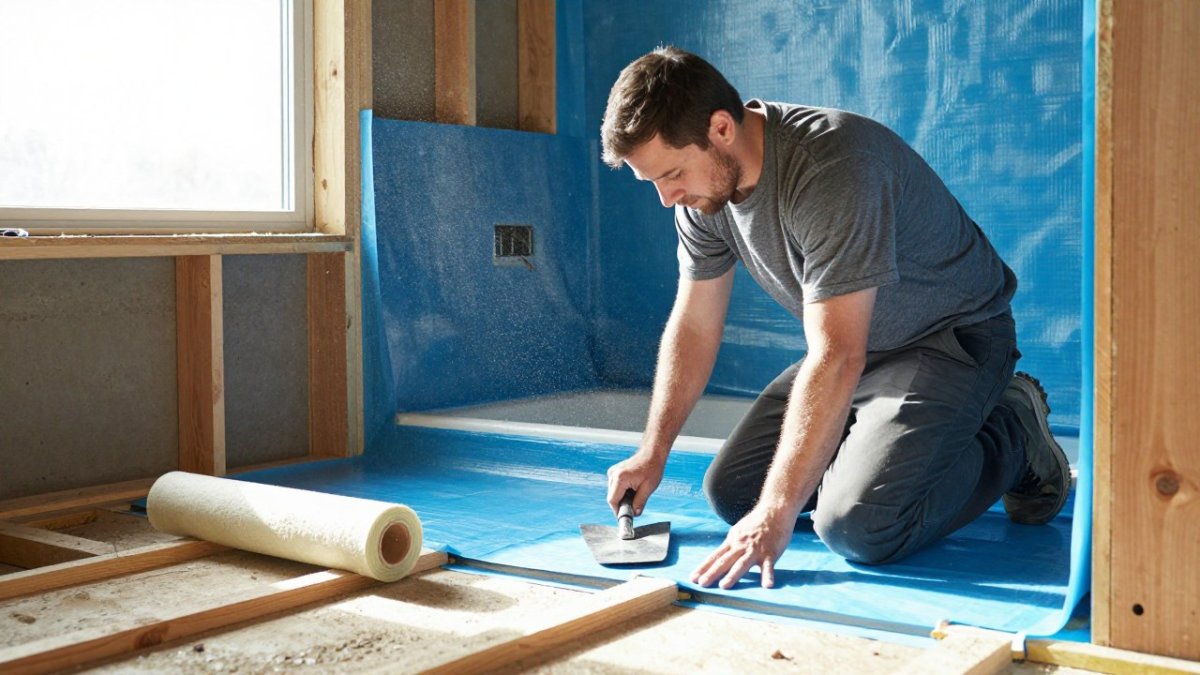
Apply a waterproofing membrane over the backer board before tiling. This membrane creates a continuous barrier that stops water penetration. Common options include liquid membranes, sheet membranes, and pre-formed panels.
Liquid membranes are applied with a roller or brush. They cure to form a seamless, flexible barrier. Sheet membranes come in rolls and are adhered to the wall surface. Pre-formed panels like FIBO wall panels eliminate the need for separate waterproofing because the waterproofing is integrated into the panel structure.
The membrane must extend:
- From the floor to at least 6 inches above the shower head
- Around corners and into the corners where walls meet
- Completely covering all backer board surfaces in wet areas
- Behind any recessed shelves or fixtures
Proper application means overlapping seams by at least 6 inches. No gaps or thin spots can be left. Water finds these weak points and penetrates behind the waterproofing.
Grout, Caulk, and Sealant Application
Grout fills the spaces between tiles but doesn't waterproof. Water moves through grout into the wall cavity. This is why waterproofing membranes must be installed first.
Use epoxy or urethane grout instead of standard cement grout. These materials resist moisture better and last longer. Proper grouting technique means packing grout densely into joints without voids or gaps.
Caulk the corners and edges where tiles meet. Standard grout cracks in corners due to movement. Caulk remains flexible and seals these vulnerable areas. Use 100 percent silicone caulk rated for wet areas.
Sealers applied over grout add an extra moisture barrier. These penetrating sealers fill pores in grout and reduce water absorption. Reapply sealers every 1-2 years to maintain protection.
Shower Wall Panels to Prevent Mold and Moisture
Shower wall panels offer an alternative to traditional tile that eliminates many mold risks. Panels are installed over a waterproofing membrane, creating a smooth, seamless surface with no grout joints for water to penetrate.
FIBO wall panels, which Revo Kitchen and Bath specializes in, provide integrated waterproofing. The panels are manufactured with moisture-resistant materials throughout. They don't absorb water like tile backing materials. Seams between panels are sealed with waterproof caulk, creating a continuous barrier.
Benefits of panel systems for mold prevention:
- No grout lines where water can penetrate
- Seamless installation reduces gaps and weak points
- Easier to clean without crevices where mold hides
- Integrated waterproofing reduces installation complexity
- Long-term durability without recaulking every few years
- Modern aesthetics with cleaner appearance than traditional tile
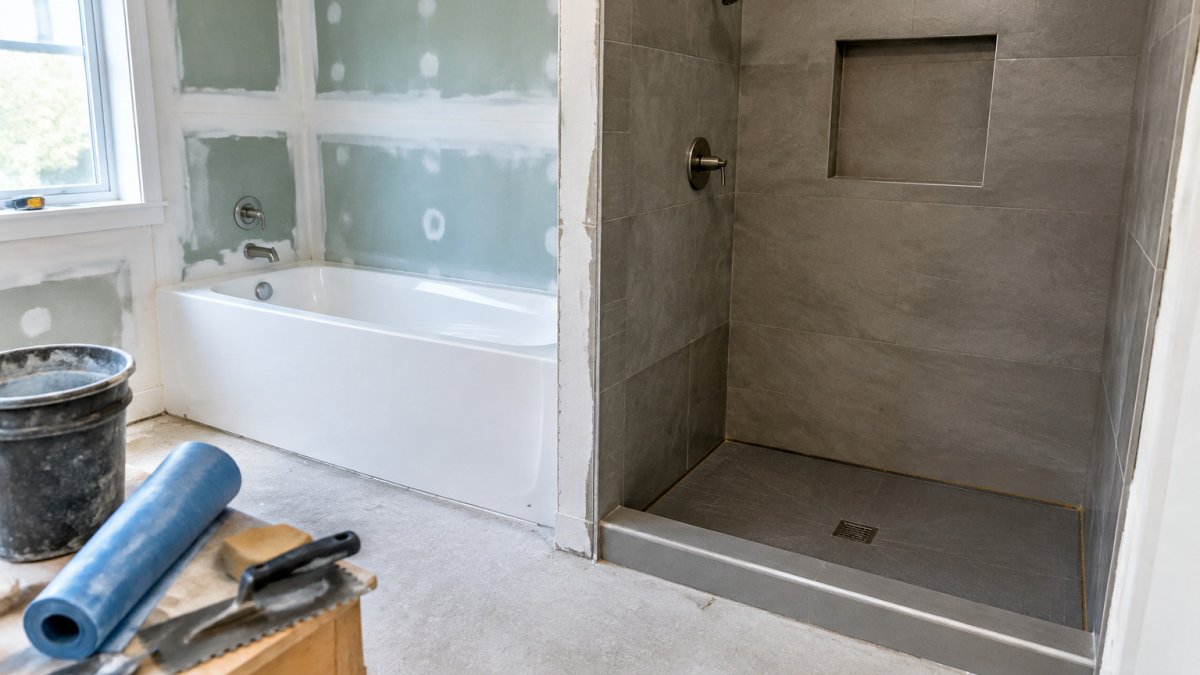
Panels are installed over backer board and waterproofing membrane. The installation process is faster than tiling. Fewer materials mean fewer potential failure points. The end result is a shower wall that resists moisture and mold more effectively than traditional construction.
Moisture Control and Routine Maintenance
Preventing mold requires controlling moisture every single day. This means removing excess water before it has time to soak into materials and create conditions for mold growth.
Daily Drying and Air Circulation
After each shower, dry the shower walls with a towel or squeegee. This removes standing water that would otherwise soak into grout and caulk. It takes only a few minutes but dramatically reduces moisture accumulation.
Run the exhaust fan during the shower and for 20-30 minutes afterward. This removes humid air before condensation forms on walls. Open the bathroom door to allow air circulation into other areas of the home.
Improve air circulation by:
- Keeping bathroom doors open between uses when possible
- Running ceiling fans to move air around the bathroom
- Opening windows on dry days to exchange humid indoor air for dry outdoor air
- Ensuring vents aren't blocked by towels or other items
The goal is simple: don't let moisture sit. Water that evaporates quickly won't condense inside walls. Moisture that gets removed by ventilation can't feed mold growth.
Weekly Cleaning and Inspection
Clean shower walls weekly with a bathroom cleaner. This removes organic debris that mold feeds on. Pay special attention to grout lines and caulk seams where mold often starts.
Inspect your shower walls during cleaning:
- Look for any discoloration or staining
- Check grout for soft spots or crumbling
- Feel tiles to ensure they're firmly attached
- Examine caulk for gaps or separation
- Smell for any musty odors
Early detection of problems allows you to address them before mold spreads. A small area of discolored grout can be recaulked. A loose tile can be reset. These minor repairs prevent major water intrusion problems.
Keep bathroom humidity below 60 percent. Use a humidity meter to monitor levels. If humidity regularly exceeds this threshold, your ventilation system isn't adequate. Consider upgrading to a larger fan or adding a second exhaust vent.
When to Call a Professional for Hidden Mold
Sometimes mold has already grown behind walls before you notice it. Professional remediation becomes necessary when the problem is extensive or hidden.
Call a professional if you notice:
- Persistent musty odor despite cleaning and ventilation
- Water stains that reappear after the wall dries
- Soft or spongy drywall adjacent to the shower
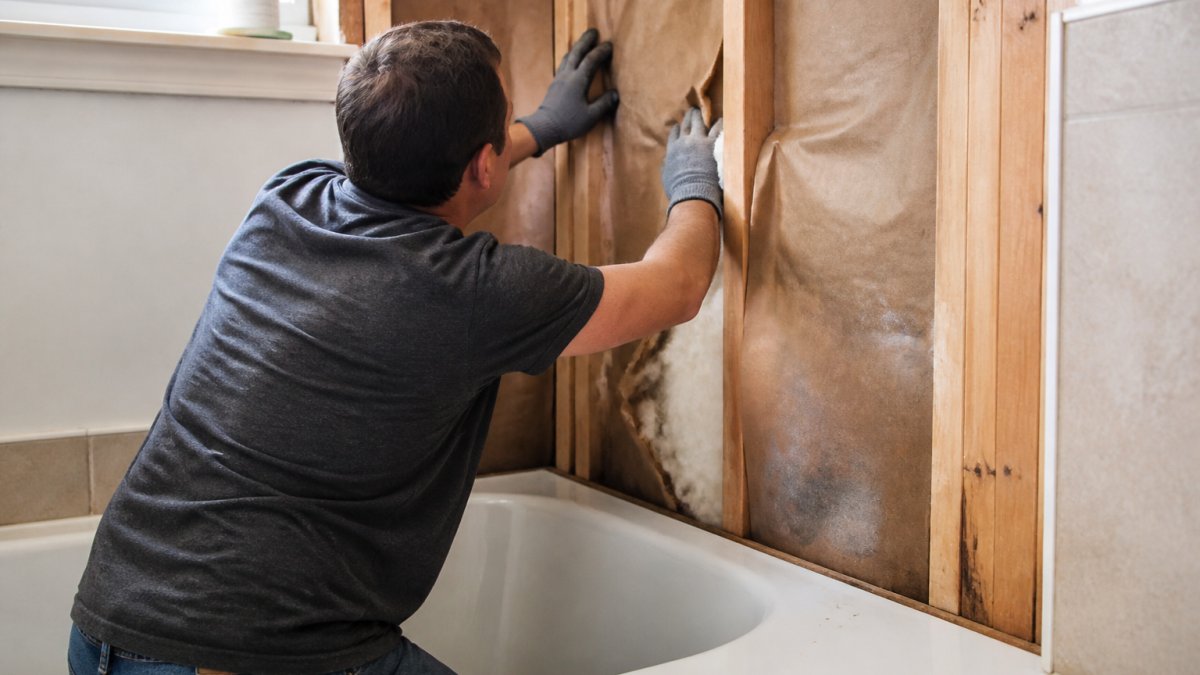
- Visible mold growth inside wall cavities if walls are opened
- Tiles that are lifting or moving independently
- Signs of water damage in adjacent rooms or below the bathroom
Professional assessment determines the extent of mold growth and moisture damage. Professionals can access hidden areas without unnecessary destruction. They determine whether mold removal is necessary or if the affected materials need replacement.
For shower renovation projects, professionals ensure proper waterproofing installation. Our team has over 30 years of hands-on experience with bathroom construction. We install waterproofing systems correctly the first time, preventing mold problems before they start.
Professional remediation typically involves:
- Removing affected materials down to the studs
- Treating any remaining mold with appropriate fungicides
- Installing new backer board and waterproofing membranes
- Rebuilding shower walls with proper materials and techniques
- Testing to confirm mold removal is complete
To prevent bathroom mold behind walls, use proper waterproofing, ventilation, and maintenance. The key is addressing moisture at the source before it penetrates into wall cavities.
If you're planning a bathroom renovation or concerned about existing mold problems, get a free quote from Revo Kitchen and Bath.
Frequently Asked Questions
How can you tell if mold is hidden behind a shower wall?
Look for soft or loose tiles, staining on grout lines, a persistent musty odor, or discoloration spreading behind visible surfaces. If wall panels feel spongy or warm areas show condensation buildup, moisture is trapped inside. Probe corners and seams gently, if drywall crumbles or feels damp, hidden mold likely exists. Professional inspection using moisture meters can confirm water intrusion before visible damage appears.
Do waterproof shower wall panels prevent mold behind bathroom walls?
Yes, when installed correctly over a moisture barrier. Waterproof wall panels eliminate the porous surfaces where mold thrives and block water from reaching wall framing and insulation. They work best when combined with proper slope, drainage, and ventilation. Unlike traditional tile, panels have fewer seams and caulk joints where water can seep through, reducing the pathways for moisture intrusion that lead to hidden mold growth.
What's the best way to prevent bathroom mold in a small bathroom with limited ventilation?
Install an exhaust fan rated for your bathroom size (check CFM requirements based on square footage) and run it during and 20-30 minutes after showers. Open a window if available to increase air circulation. Wipe shower walls dry after each use, and keep the bathroom door open between showers. Use mold-resistant paint and materials, and consider upgrading to waterproof wall panels that resist moisture penetration better than standard drywall or tile.
How often should you inspect bathroom walls for signs of mold?
Inspect visible surfaces weekly during your routine cleaning, checking grout, caulk, and corners for discoloration or staining. Check behind tile or wall panels monthly by looking for soft spots, odors, or loose sections. After heavy use periods or if humidity stays high, increase inspections to twice monthly. If you notice soft drywall, warm spots, or musty smells, contact a professional immediately, early detection prevents costly remediation and health risks.